This is a quick guide to get yoast set up on your wordpress site. This guide will help you to quickly configure yoast and get you started with ranking in search engines like google, bing and pinterest.

Step 1: Install yoast
- In wordpress locate “plugins” in the admin side panel on the left side of your screen.
- In the plugins page, up the top, go to “add new plugin”.
- Search for “Yoast SEO”, install it, then click “activate”.
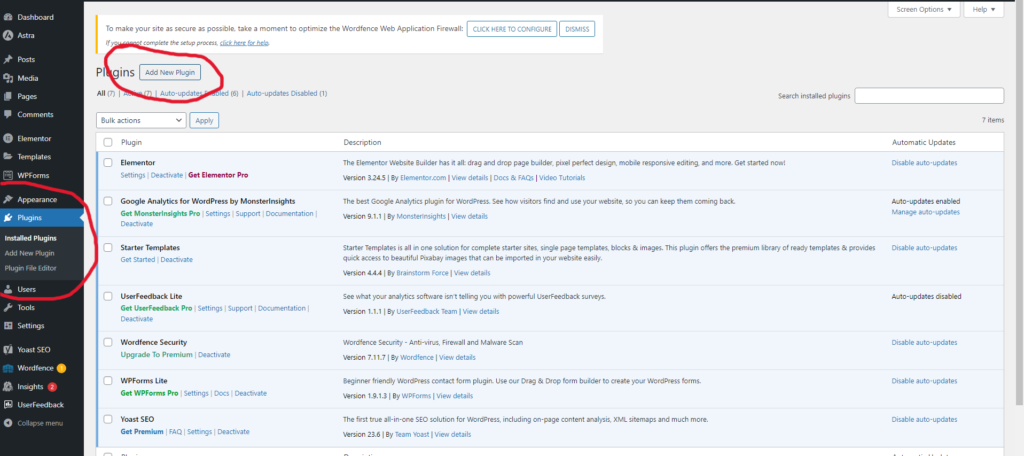
Great job, you’ve installed yoast. lets move onto the configuration
Step 2: Configure yoast
- Hover over the “Yoast” icon in the left hand side admin panel and click “general”.
- Up the top click “first time configuration”.
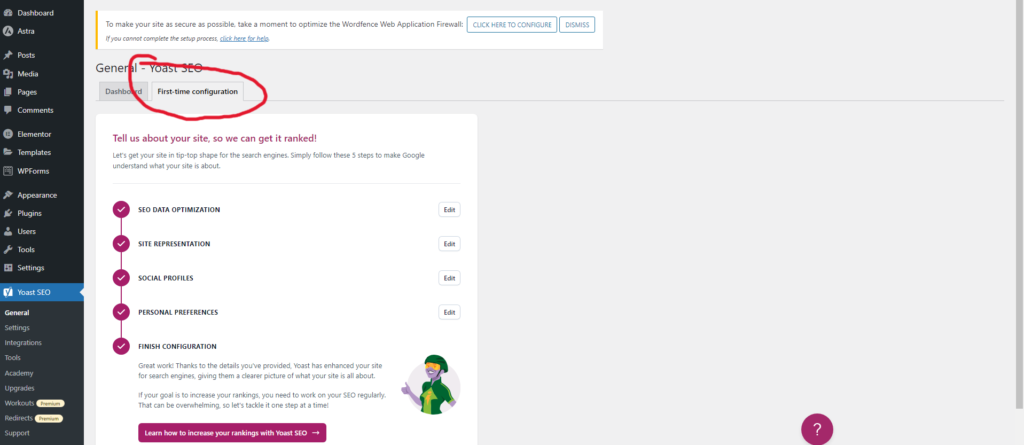
SEO DATA OPTIMIZATION
- Click the “Start SEO data optimization” button and wait for it to finish, the click continue.
SITE REPRESENTATION
- Under “Does your site represent an Organization or Person”. select which choice e.g. are you a solo blogger or a large bussiness.
- Under “Website name”, input the name of your website.
- Under “Organization name” input the name of your actual organization.
- Under “Organization logo”, upload a file of the image you want shown in the google browser when people search for you.
SOCIAL PROFILES
- Here you can link your social profiles e.g. facebook, instagram, linkedin etc.
PERSONAL PREFERENCES
- “Yoast SEO usage tracking”. This is just to help yoast to improve their product, i personally choose “no” but its up to you.
- “Yoast newsletter”, this is also optional, I choose no because i dont like too many emails.
Finish Configuration
Great job, this part is complete. you can click “Go to your SEO dashboard” to continue.
Step 3: Configure General Settings
- Hover over the yoast icon in your admin lefthand side panel and select “settings”
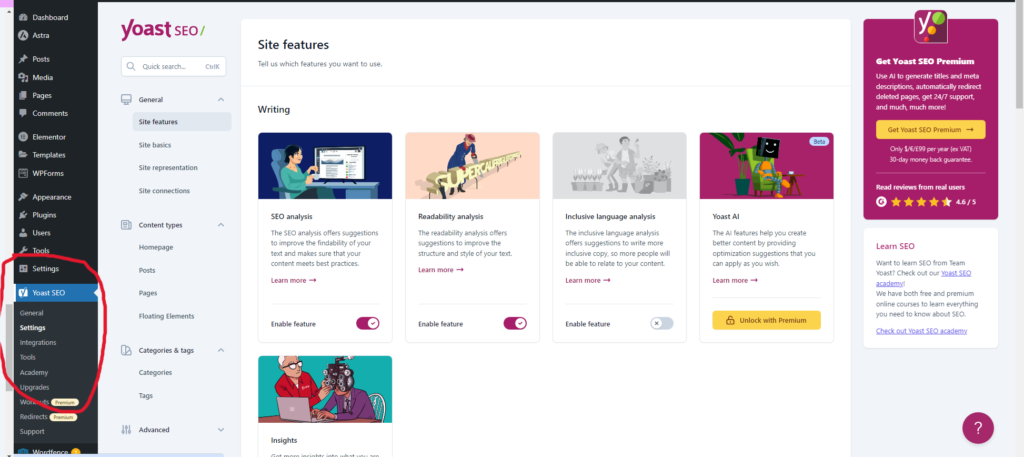
GENERAL - SITE FEATURES
- Under the “General” tab, click on “site features”.
- Make sure “SEO analysis”, “Readability analysis” and “Insights” is checked.
- The rest of the items that should be checked will be checked by default.
GENERAL - SITE BASICS
- Under “Website name”, input your website name that will show up in the search results. e.g “Gamer Brainz”.
- Under “Tagline”, input the tagline you want to show up in search results e.g. “Gamer Brainz – Home Of Gaming” etc.
- Under “Site image” upload image. This is the image that shows when someone shares your website on social media.
- “restrict advanced settings for author” turned on.
- “usage tracking” up to you, i personally leave it off.
- “site policies” only relevant if you are a large news network.
- click “Save changes” to continue.
GENERAL - SITE REPRESENTATION
- “Organization or person”, select relevant to your bussiness.
- Under “Organization name” input your organizations name, Under “Alternate Organization Name” you can input a shortened name of your bussiness if your name is really long.
- Under “Organization Logo” upload your logo to appear in google search results.
- Under “Other Profiles” link your social profiles if you didnt do so before.
- Save changes.
GENERAL - SITE CONNECTIONS
- We will come back to this step later, please move on for now.
Step 4: Configure Content Type Settings
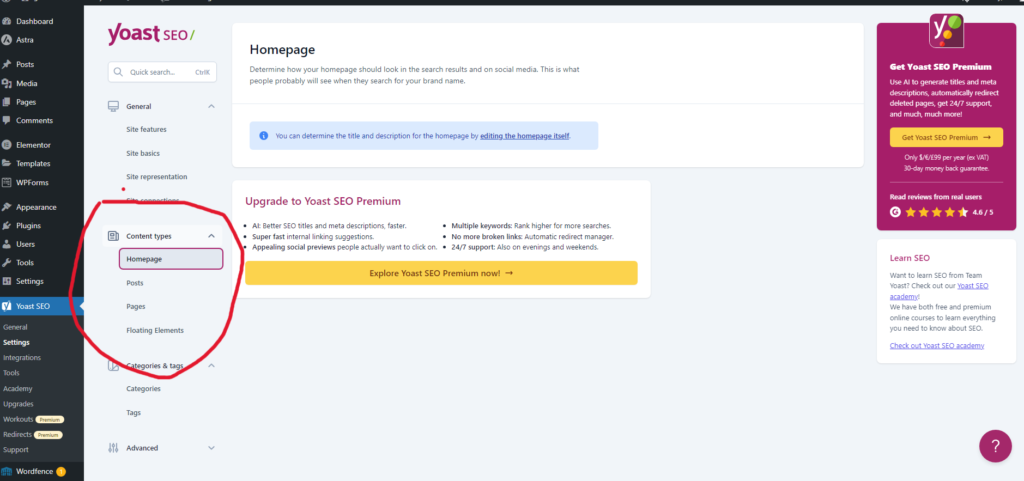
CONTENT - HOMEPAGE
- This is the on page optimization, we will come back to this. please move on for now.
CONTENT - POSTS
- “Show posts in search results” should be on.
- Under “SEO title”, in the “Insert variable”, you should only have “title” in there.
- Under “Meta Description” type “%excerpt” and insert it, this is essentially content from your post.
- Under “Schema”, Under the “Page Type” option, select “Web Page (default)”.
- Under “Article Type” select “Article (default)”.
- Under “Additional settings” make sure the “Enable SEO controls and assesments” is on.
- Save changes.
CONTENT - PAGES
- “Show pages in search results” should be on.
- Under “SEO title”, in the “Insert variable”, you should only have “title” “seperator” and then type in “%tagline” and enter it.
- Under “Meta description” type in “%excerpt”.
- Under “Schema”, Under the “page type” select “Web page (default)”.
- Under “article type” select “none (default)”.
- under “Additional settings” the “Enable SEO controls and assesments” should be on.
- Save changes.
CONTENT - FOOTERS & HEADERS
- The “Show footers in search results” should be switched to off.
- The “show headers in search results” should also be switched to off.
- Save changes.
Step 5: Configure Categories & Tags
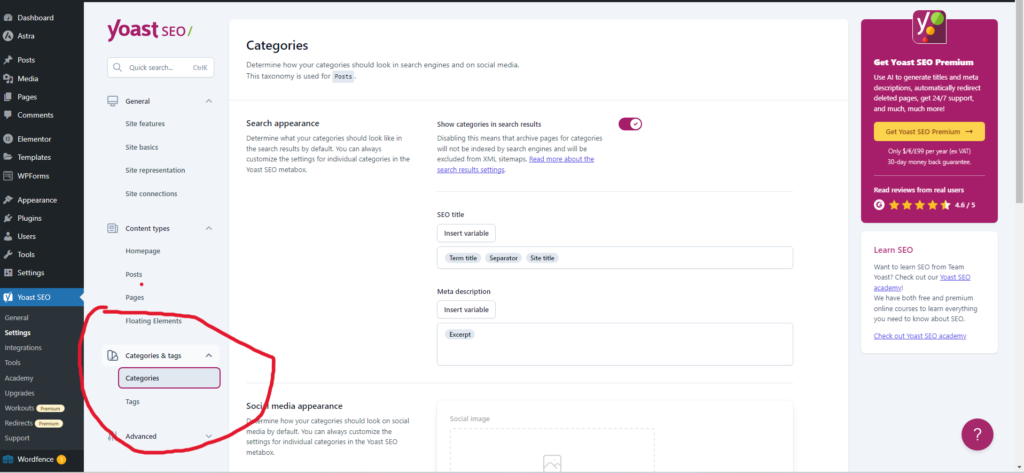
CATEGORIES & TAGS - CATEGORIES
- “Show categories in search results” should be on.
- Under “SEO title” you should have “term title”, “seperator”, and “site title” in the input fields.
- Under “Meta description” type in “%excerpt”.
- Under “Additional settings” make sure “Enable SEO controls and assesment” and “show categories prefix in the slug” are turned on.
- Save changes.
CATEGORIES & TAGS - PORTFOLIOS
- If you have portfolios under your settings, follow the same formula as “categories”.
CATEGORIES & TAGS - PRODUCT CATEGORIES
- again, if you have this option, follow the same formula as “categories”
CATEGORIES & TAGS - PRODUCT SHIPPING
- If you have “Shipping classes” in your options, Under the “Show product shipping classes in search results”, turn to off.
CATEGORIES & TAGS - TAGS
- Under “Show tags in search results”, make sure this option is turned off.
- if you have unnecesarry tags in your options menu, e.g. “Product tags” etc, it is a good idea to turn those off too.
Step 5: Configure Advanced Options
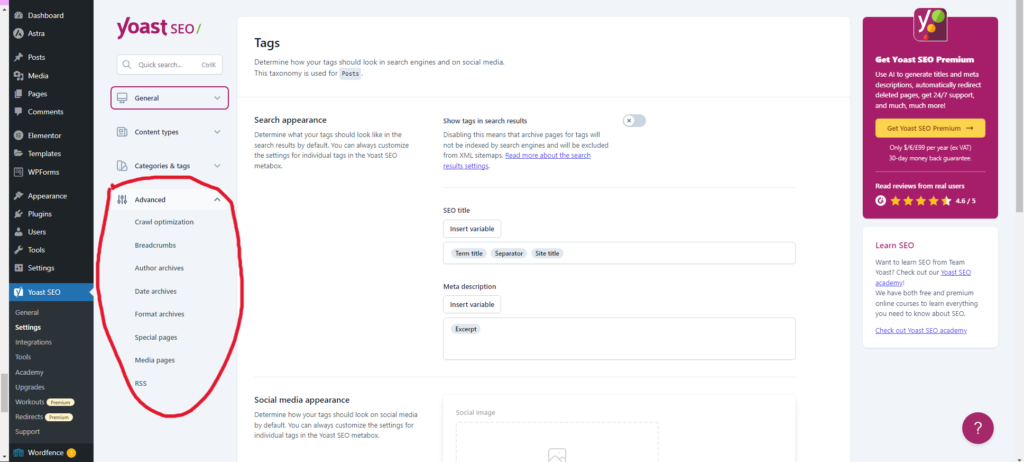
ADVANCED - CRAWL OPTIMIZATION
- This does not need to be changed.
ADVANCED - BREAD CRUMBS
- Breadcrumbs arent neccessary but if you want it there is other guides on this. for this guide we will skip it.
ADVANCED - AUTHOR ARCHIVES
- “Enable author archives” this should be turned off if you only have one writer on your website. this feature is used if you have multiple writers on your page. If you are a large website with many writers, this should be turned on.
- Save changes.
ADVANCED - DATE ARCHIVES
- “Enable date archives” should be switched to off.
- save changes
ADVANCED - FORMAT ARCHIVES
- “Enable format-based archives” should be switched to off.
- Save changes.
ADVANCED - SPECIAL PAGES
- This does not need to be changed.
ADVANCED - MEDIA PAGES
- “Enable media pages” should always be switched to off.
- Save changes.
ADVANCED - RSS
- In the “content to put after each post in the feed”, should have some text in it that looks like this, The post %%POSTLINK%% appeared first on %%BLOGLINK%%. You do not need to change this.
FINISHED WITH SETTINGS
Great job, you have finished the settings section of the guide. We will now move on to getting your website listed in search engines.
Step 6: Integrating Your Website With Google Search Engine.
Too begin head over to the Yoast settings and go to “Site connections”.
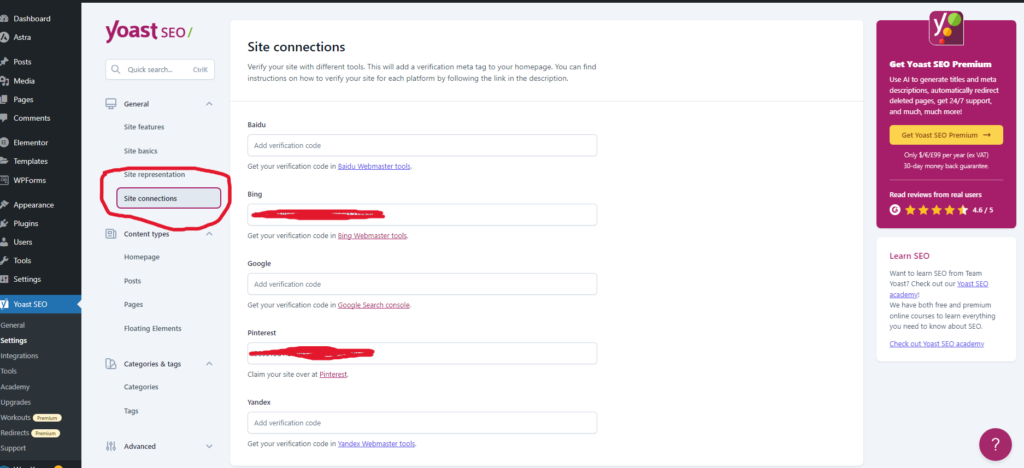
We are going to integrate with google first
- You will need a gmail account for this step, you can make one during the proccess if you do onot have one.
- Under the “Get your verification code in Google Search console” select the link.
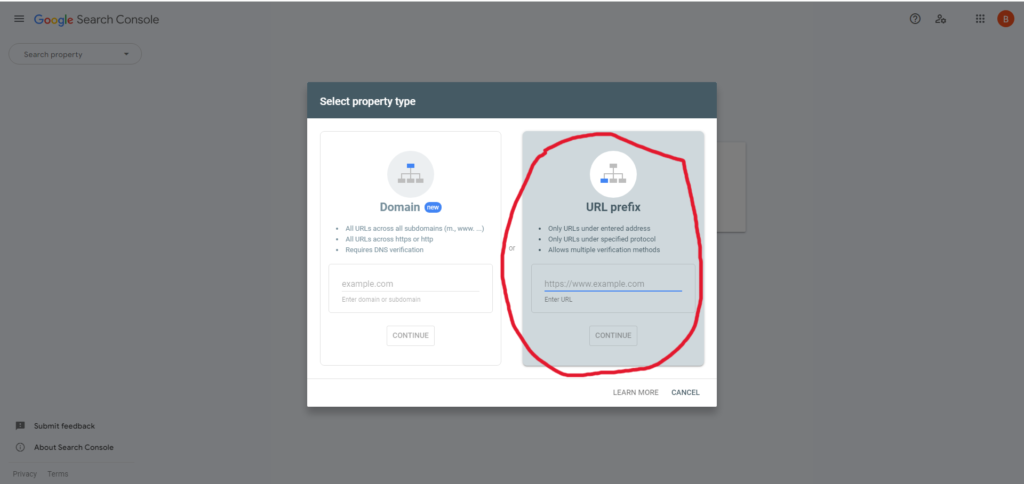
- Once you have signed in you will be asked to “add a property” this can be found here:
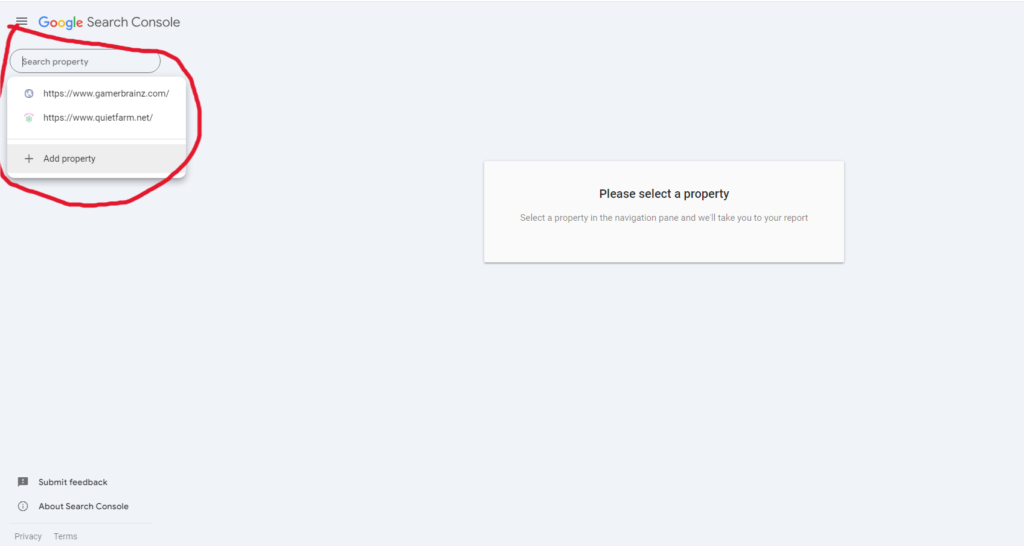
4. You need to enter Your website URL prefix with https in front (your websites domain) e.g. https://www.mywebsite.com
You should get a popup saying this has been verified automatically:
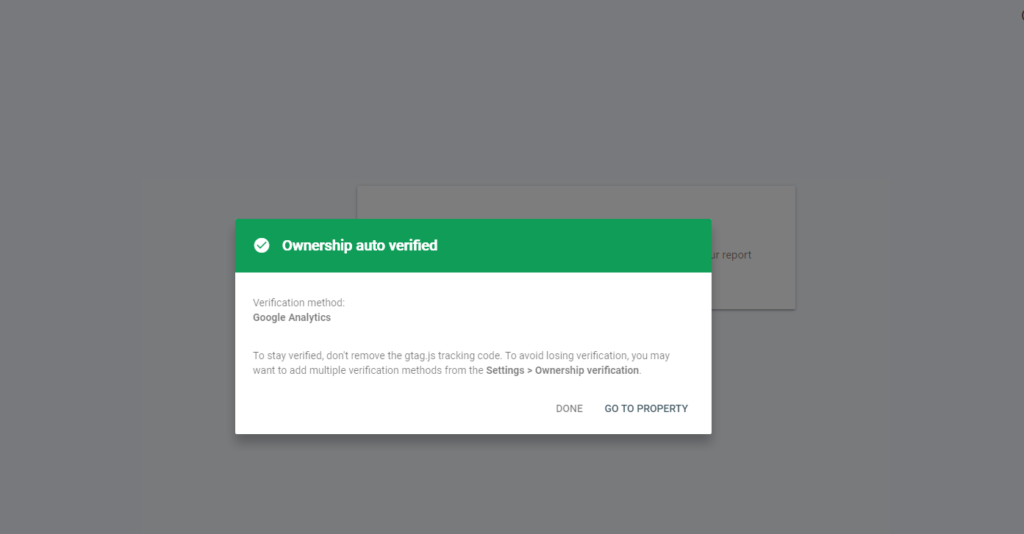
If you do not get this popup, there should be an HTML tag popup when you go to verify. copy the meta tag, then go to your site settings in yoast and paste it in here:

It may take some time to verify. in the google search console page you will be able to see information about your website. leave this page open for the time being as we will come back to it.
Step 7: Integrating Your Website With Bing Search Engine.
Too begin head over to the Yoast settings and go to “Site connections”. Under “Get your verification code with Bing Webmaster tools”, click the link. You will need an account for this.

- We are going to import from google search console as we have already set up google search engine.
- Click on “Import” in the google search console option, click continue.
- Sign in with the same account you used to integrate google, give bing acces, click “Allow”.
- In the import sites menu, make sure only the site you want to be integrate is ticked, then click import.
- When you have completed these steps, it should bring you to the bing webmaster tools homepage.
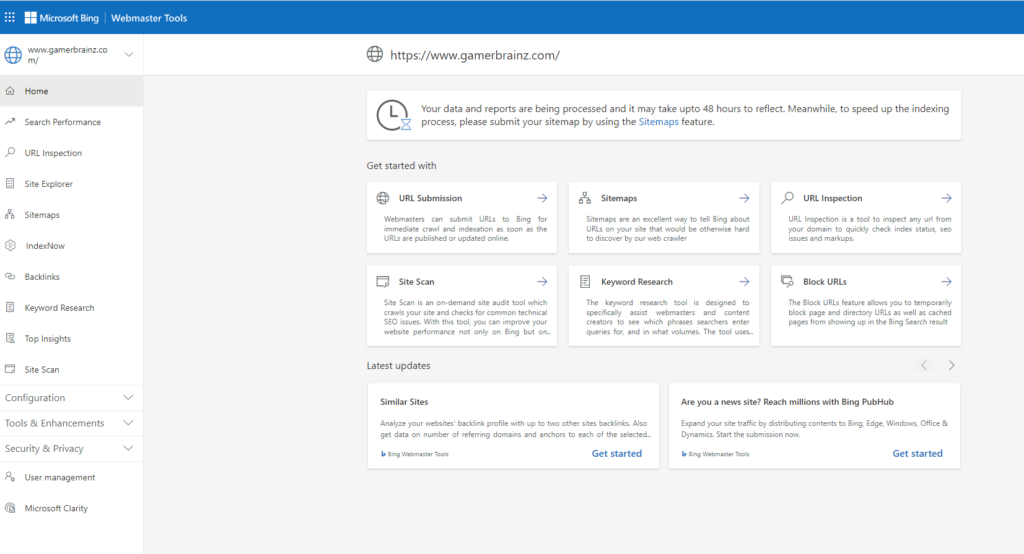
Great job, your website is now inegrated with bing. We are now going to integrate it with pinterest.
Step 8: Integrating Your Website With Pinterest.
- Too begin head over to the Yoast settings and go to “Site connections”. Under “Claim your site over at pinterest” click on the link. You will need a pinterest account for this.
- Once youve logged into pinterest, under your account logo in the top right, go to “settings”.
- go to claimed accounts:
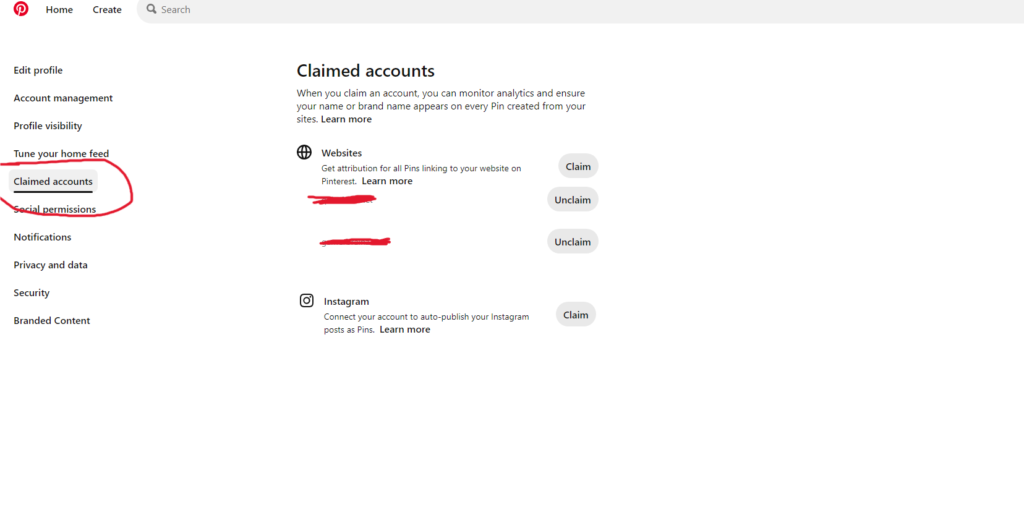
4. Click on “Claim a website”.
5. Under the “Add HTML tag” copy the html code.
6. go back to your “site connections” under settings in yoast and paste the HTML code.
7. Save changes
8. Now go back to pinterest and in the “choose what you want to claim” menu, click continue.
9. Input the url of your website and click on “Verify”, if you have an error, try again in a few minutes.
Great job, you are now integrated with google, bing and pinterest. Its time to now submit your site maps.
Step 9: Sumbitting Site Maps
In your yoast settings, go to the search bar and type in “XML sitemaps”, and select the result.
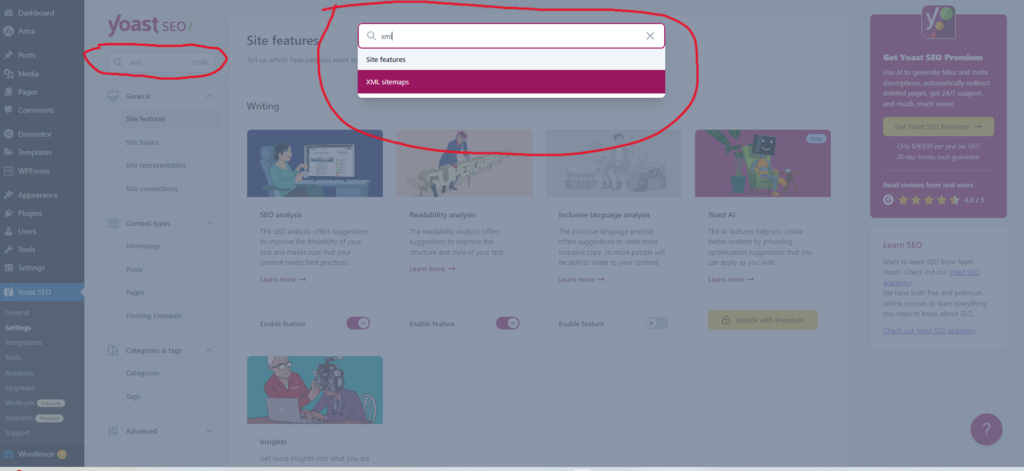
- Click on “view the XML Sitemap”, this will open up youre site link page, copy the url at the top of your page:
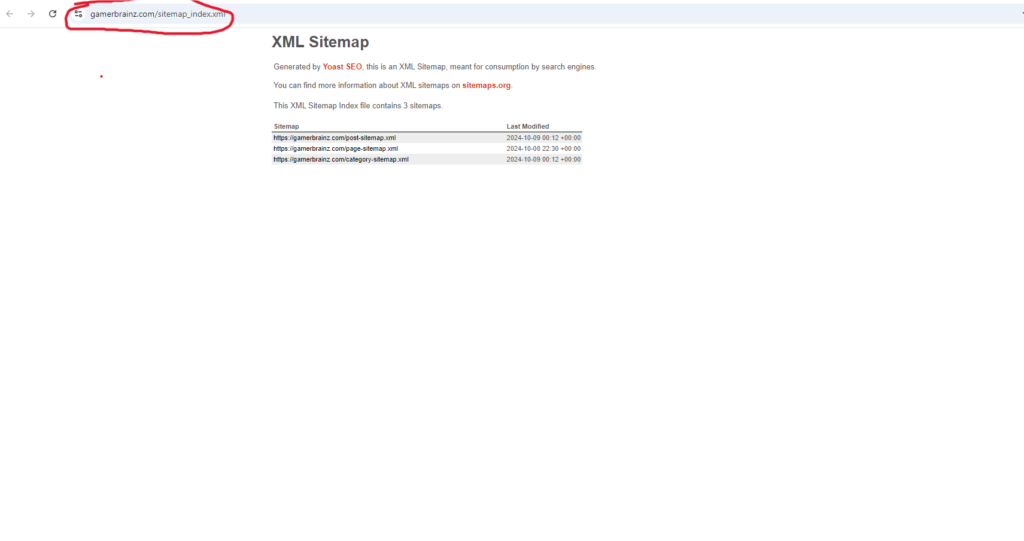
2. Go back to your google search console page and select “site maps” in the left hand side panel.
3. In sitemaps input paste your url and remove the begging of the link so it looks like this:
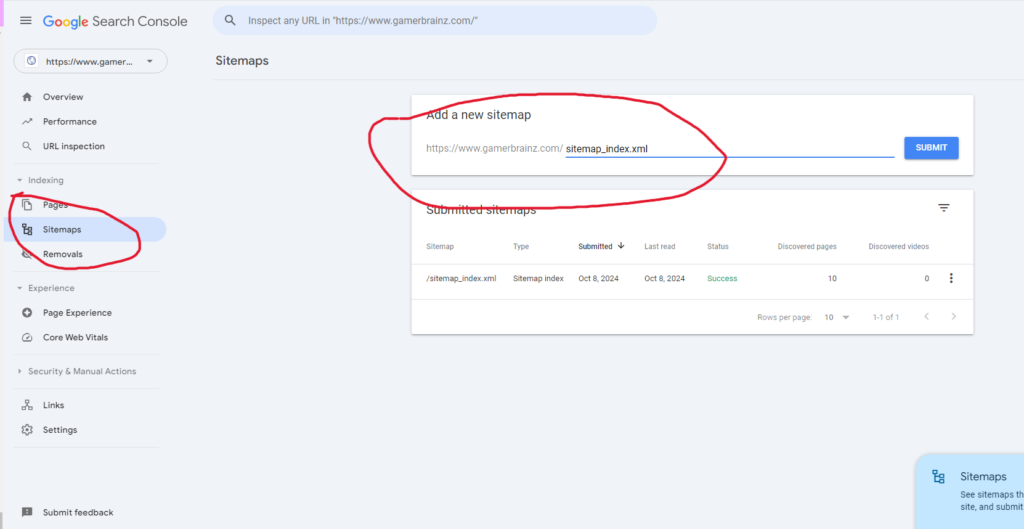
4. You should see a success message next to your submitted sitemaps if this has been done correctly. If it does not say success, refresh the page.
SUBMITTING FOR BING
This is the same process for bing:
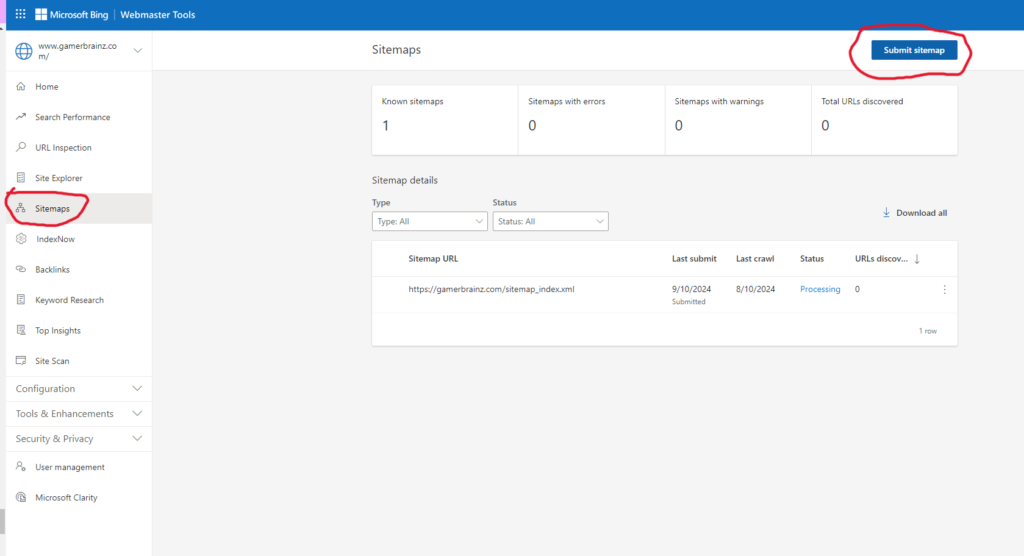
- In Bing Webmaster tools home page, go to the left handside panel and go to “sitemaps”.
- Click on “Submit Sitemap” in the top right hand corner:
- Paste in the same url you pasted in for google.
Great job, you’ve submitted your sitemaps and have integrated your website with Google, Bing and Pinterest, were nearly done. We will now do on page optimization.
Step 10: On Page Optimization
- In your wordpress dashboard, go to “pages” in your left hand sidepanel.
- Go to the page you want to optimize and click “edit”
- On the right hand side in the edit panel click the yoast icon and click search appearances:
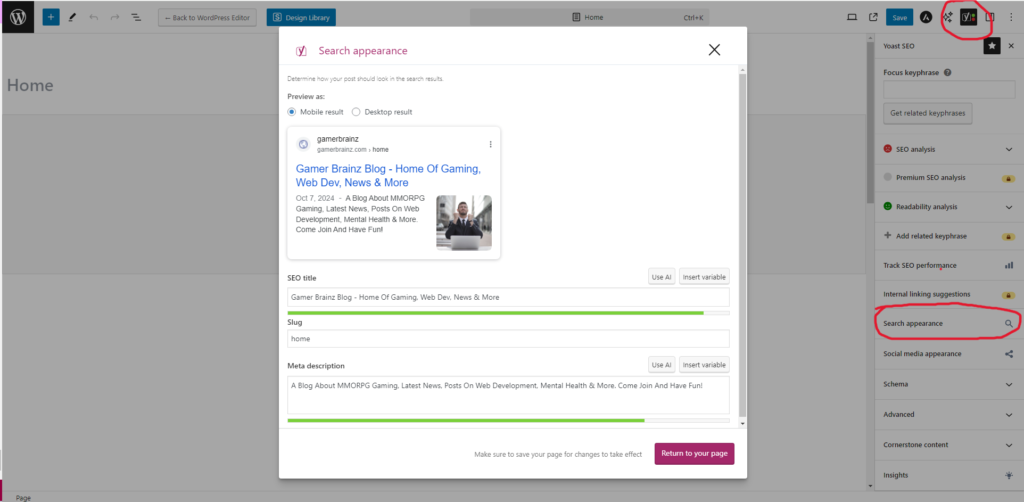
4. In “SEO title” for both desktop and mobile. Input what you want to come up in the search results. the above image gives a snapshot of what your website will look like in the search engines.
5. Do the same for the meta description, make sure you add in key words that you want for when people do a search. for instance I have put in “Gaming”, “development”, “blog” etc. Do this for all of your wordpress pages.
And thats it! Your website will now start ranking in these search engines. This was a quick guide to get you up and running, but SEO is a very large indepth topic. If you are interested in learning more about SEO there is loads of content online. I hope this guide helped.
